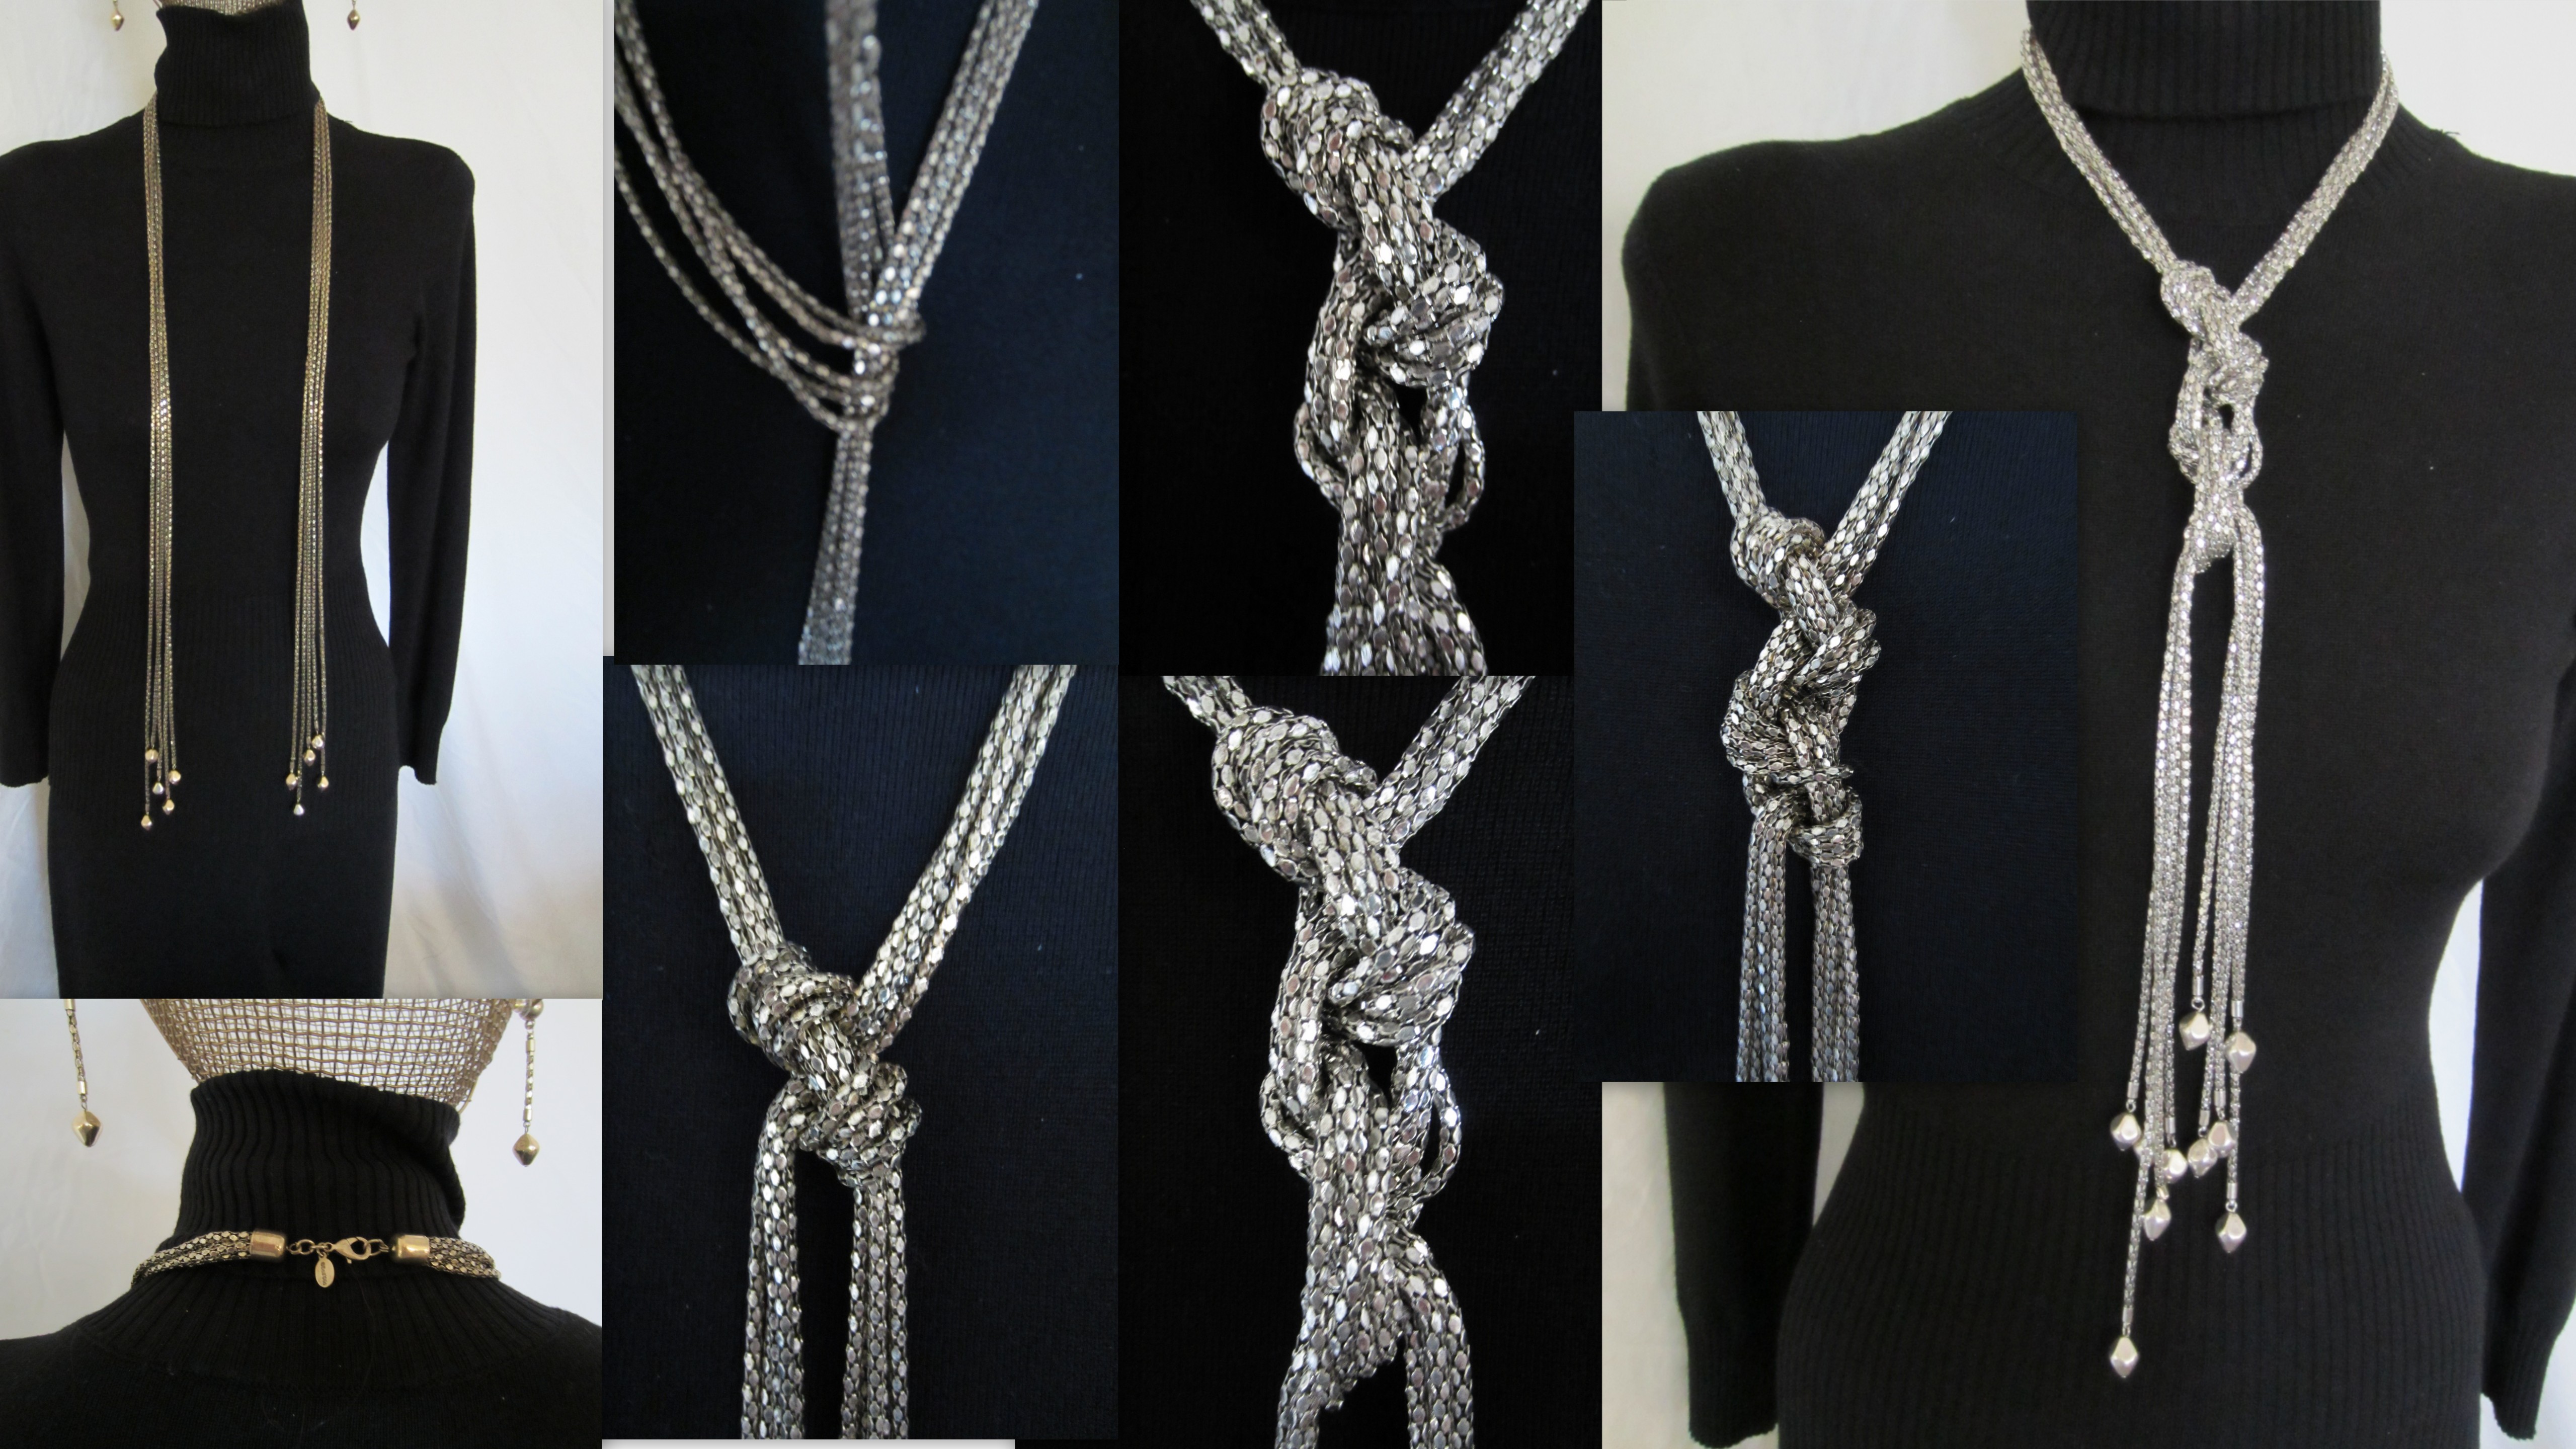
………………….The HARLEQUIN necklace is a very versatile necklace, and something you create yourself. Does that sound intimidating? It’s not…..All you need to know is how to tie a knot……
1-Make sure the LOBSTER CLAW is fastened. There is no extender [it’s not necessary] so you just make sure it is closed.
2-Place the necklace around your neck as the photo at the extreme upper left. Have the two sides hang like a scarf as evenly as possible. The bottom beads are staggered so don’t even try to even them out.
3-Make your first tie as second picture at upper left. Try to keep the individual chains at taut as possible [in my photo the chains on the left are a little loose].
4-Then begin to knot…..With each knot try to alternate the way you do it. Right over left then left over right.
5-Tie the knots tight enough so they do not slip, but don’t be over zealous and BREAK the chain! We aren’t trying to strangle the chain!
6-Make as many knots as you like. I’d say 2 to 4 should give you a good look. The more knots you make the shorter the necklace becomes. Also, you can start the first knot as close to the neck or as low from the neck as you want……….VERSATILE………….The beads at the bottom are uneven to start with so don’t try to even them out…..That would be futile.
7-When you have knotted the necklace to your satisfaction, just undo the lobster and your necklace is complete. You don’t have to re-knot the necklace again unless you want to create a different look by starting the knots higher or lower or adding or subtracting the knots. I have found that when I store the knotted necklace in a bag, I use plastic baggies, the knots can loosen up because there isn’t tension or gravity pulling them down to keep them taut, so you may want to hang the necklace if you can.
……………………Jennifer and I have made a video of tying the necklace for you to see. It will be posted when the Harlequin group is posted……………enjoy……………….much Love…………………Louis